DAE 3b-2 “Hades' Net”
| “ | The DAE 3b-2 fires rockets over long distances from a safe, emplaced position. This unique weapon was given its name due to the screams heard across the battlefield during its first deployment, with some referring to the barrage as a “web of death.” | „ |
| — In-game description |
The DAE 3b-2 “Hades' Net” (simply known as a Hades Net) is a Colonial Rocket Artillery Emplacement. It is equipped with a 3C-High Explosive Rocket Battery.
Crew
It has no AI and must be manned by a player with Q. It has two seats:
- Cannoneer (Right Seat)
- Rotates the turret by aiming with
RMB- requires another player - Sets the range with
Mouse Scroll Wheel - Can view the current azimuth and range of the gun
- Fires and reloads the cannon
- Rotates the turret by aiming with
- Operator (Left Seat)
- No armament purpose
- Requires a player to rotate the turret
Additionally a player should act as spotter with Binoculars to see the shells land and relay adjustments to the crew, and another player needs to continuously carry and submit new rockets to the gun with V to maintain a fast firing rate.
It lacks a front shield meaning the crew is vulnerable to incoming fire.
Armament
It's armed with:
- 3C-High Explosive Rocket Battery
- Mounted on the emplacement (can rotate 360 degrees, turns 7° per second)
- Ammo Used: 3C-High Explosive Rocket
- Range: 200-425 meters
- Reload Duration: 3.5 seconds per projectile
- Firing Duration: 0.4 seconds
- Fire Rate: 15 per minute (reloading after each shot); Salvo of 8 in 2.8 seconds
- Magazine Size: 8
- Vehicle must be deployed to fire
- Accuracy: 25m radius at minimum range up to 41.5m at max range (not including Wind effect)
It has a dedicated ammo slot that can hold one 3C-High Explosive Rocket.
Interactions
It can be interacted with either on foot, or in a vehicle by pressing E. 3C-High Explosive Rockets can be directly submitted into the artillery piece by pressing V. The enemy players cannot interact or use it.
Transportation
As an Emplacement it cannot move on its own, and must be packaged and lifted by Shippable#Cranes in order to be moved anywhere. It can be transported by shipping vehicles.
Placement
It can be placed pretty much anywhere on land, even on top of other structures. It can be placed within 60 meters of a region's border ("no build" zone), however it will still quickly decay there. The only notable place where it can't be placed is Bridges.
It can also be placed inside a Trench Emplacement. Doing so quadruples its health and doubles its rotation speed. However if the Trench Emplacement is destroyed, the Emplacement goes along with it.
Visibility
It is invisible at night, just like infantry. It can also be hidden by being placed inside large bushes, but is revealed to people within 10m. Only its firing effects (smoke and flashes from the barrel) will betray its presence. This only works if it's not packaged.
Production
| Structure | Input(s) | Output | Time |
|---|---|---|---|
| Small Assembly Station (Battery Line) | 20 x Processed Construction Materials 15 x Assembly Materials II 3 x Assembly Materials IV 2 MW of power |
DAE 3b-2 “Hades' Net” |
00:10:00 |
Tier 2 Facilities must be fully researched in the Weapons and Structure ![]() Tech Tree in order to be produced.
Tech Tree in order to be produced.
Tactics
Like all emplacements, the DAE 3b-2 “Hades' Net” best performs when emplaced within a trench. Although this will give away your position to the enemy, the benefits outweigh them. Doing so will increase the turn rate, and quadruple its health (effectively giving it way better survivability if under enemy attack or counter-artillery).
It should be used as a mix of regular Artillery and Rocket Artillery in that it must be moved, loaded, and fired, but should be fired in entire bursts rather than sustained barrages. If the enemy attacks it, either with infantry, vehicles, or counter-artillery, the DAE 3b-2 “Hades' Net” is unable to protect the crew from direct hits, as it does not have a shield that covers the entire emplacement.
Rocket Artillery Strategy
All equipment that uses rockets excel at burst damage, compared to regular 120mm artillery, which are suited for sustained barrages. Due to the rocket's relatively low damage and their high dispersion, they are most effective when attacking in groups, as the large volume of rockets increases the chances of hitting targets. Additionally, every rocket has a chance of setting their target on fire, preventing them from being repaired (though the 4C-Fire Rockets have a higher chance of doing this).
Trivia
- The DAE 3b-2 “Hades' Net” is currently the only Rocket Artillery equipment that is an emplacement
- In greek mythology, Hades was the god of the dead and ruler of the underworld
- It resembles the British Z Battery from World War II.
Gallery
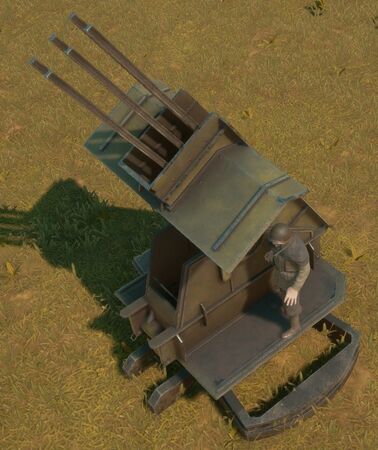
The DAE 3b-2 “Hades' Net” from the front
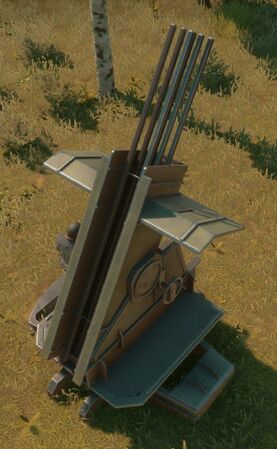
The DAE 3b-2 “Hades' Net” from the rear
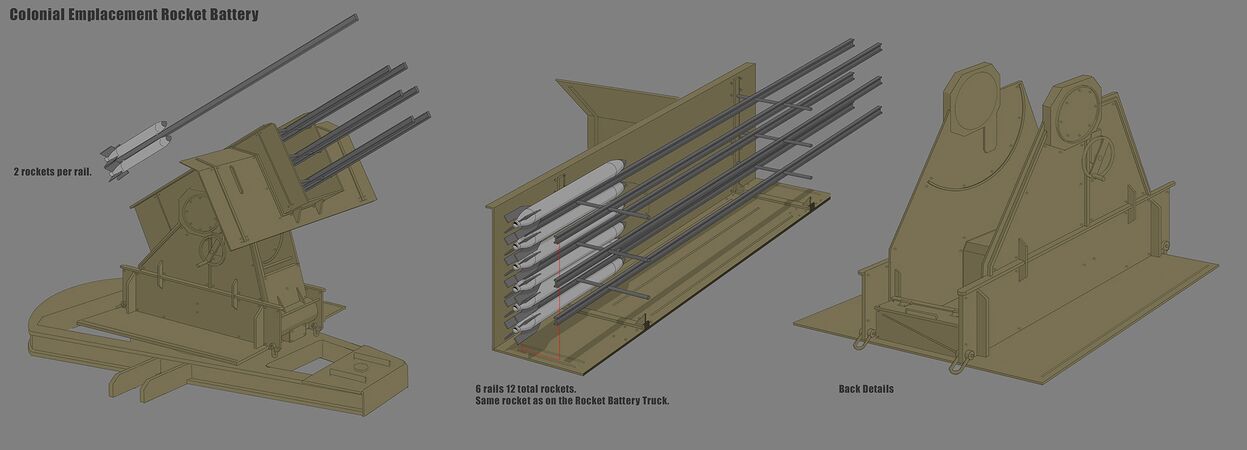
Concept art of the DAE 3b-2 “Hades' Net”


| ||||||||||||||||||||||||||||||||||
| |||||||||||||||||||||||||||||||||||||||||||||||||||||||||||||||||||||||||||||||||||||||||||||||||||