Community Guides/Getting Started/de
This article could contain outdated information that is inaccurate for the current version (1.56) of the game. It was last updated for 0.45.
Willkommen zu Foxhole. Wenn du Neu bei diesem Spiel bist, dann gibt es ein Haufen an Community gemachte Tutorials zu verfügung für dich! Für mehr Hilfe kannst du beim Offiziellen Foxhole Discord, bei den Steam Discussions oder in Guides nachfragen! Wenn du dir nicht sicher bist über die Terminologie die Spieler benutzen, dann kannst bei der Slang Seite vorbeischauen.
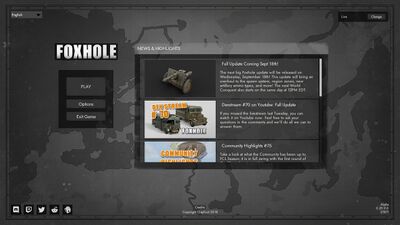
Hauptmenü
Shard auswahl
Nachdem man auf “Play” drückt, musst du auswählen welchen Shard du beitreten willst. Ein Shard is im prinzip ein separater Gameserver komplett unabhängig voneinander. Die Shards helfen damit, dass das Spiel mehr Spieler aushält. Du kannst in beiden Shards spielen, sogar in unterschiedlichen Fraktionen. Shards sind nicht verlinkt mit Weltregionen (EU, NA, Asia, etc...), jeder spieler auf der Welt spielt auf dem selben Shard.
Der “Live-1” Shard ist im normalfall mehr bevölkert, dass dafür sorgt dass wartezeiten länger dauern können.
Nachdem du ein Shard ausgewählt hast, drücke “Play” erneut und du wirst zum Fraktion auswahl menu gesendet.
Fraktion auswahl
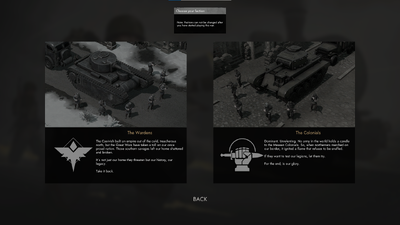
Dir wird eine Auswahl zwischen den Fraktionen Wardens und Colonials gezeigt.
Die zwei Fraktionen sind sehr ähnlich zueinander auf Spielablauf weise. Jedoch sie haben visuelle unterschiede in deren Fahrzeugen. Sei aber gewarnt, dass du nach 6 minuten nach dem Beitreten einer Fraktion (auf diesem Shard) nicht mehr wechseln kannst bis der krieg zu ende ist und ein neuer gestartet hat. Wenn du mit Freunden spielst ist die besser voraus zu entscheiden welch Fraktion du beitretest.
Wenn du unter level 5 bist, erlaubt dir das spiel eine einzige chance fraction nach 6 minuten zu ändern.
Drück den “Deploy” knopf um in deiner Heimatregion zu spawnen.
Die Heimatregion ist nicht wirklich der Krieg sondern eine Lobby und Trainings region.
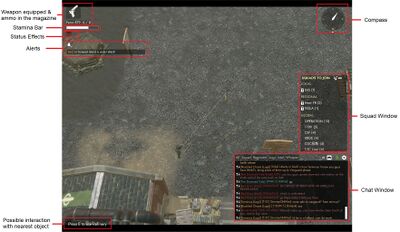
UI
The status effect you should worry about: "Encumbered" ![]() (carrying too much weight, drop some items), "Bleeding"
(carrying too much weight, drop some items), "Bleeding" ![]() (slowly losing health, get medical help), and "freezing"
(slowly losing health, get medical help), and "freezing" ![]() (slowly freezing to death, go somewhere warm).
(slowly freezing to death, go somewhere warm).
Movements & Camera
WASD: MovementC: CrouchX: ProneSpacebar: Climb / VaultShift: SprintHold MMB + mouse movement: Rotate cameraRMB: Aim (camera zooms out and follows)
Kommunikation
Voice Chat:
T: Local Voice ChatG: Squad Voice ChatU: Enable/Disable Voice Chat
Text Chat:
Enter: open chat / Send Chat MessageTab: switch chat channel
Hier ist eine schnelle beschreibung für jeden Kanal:
- Local: Sprich mit den spielern in deiner nähe
- Region: Sprich mit allen verbündeten in derselben Region
- World: Sprich mit allen verbündeten in der Welt
- Logistics: Welt Chat über Logistics
- Intel: Welt Chat über Intel
Ausrüstung & Interaktionen
Tab: InventoryLMBon item in backpack: Equip Item1/2/3: Equip Primary/Secondary/Tertiary weaponRMB: AimLMB: Use held item / Fire weapon (must be aiming to fire)R: ReloadF: Switch fire mode / attach bayonet (if applicable)
Q: Enter vehicle/structure
E: InteractShift + E: Interact Context Menu (i.e. when there's multiple possible interaction)Escape: Exit / Menu
Map
Press M to open the map, this will only show the map of the Home Region for now since you haven't joined the real world. The orange arrow is you. Notice the different training areas marked, and the "Deploy" areas represented by crossing swords. The deploy point is where you'll need to go to join the real war.
Appearance Selection
You can change your appearance at any of the cylindrical barracks near the area you spawned in. Press E to open the appearance menu.
Deploying into the War
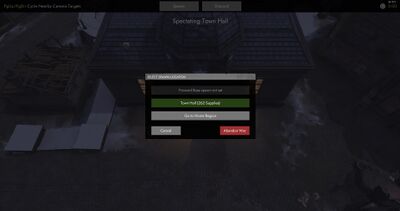
To get into some action, locate the Spawn & Deployment (Deploy) on the map and head there. When you are close enough to the deploy area, press default key E to open the deployment menu. You can also check the war map by going to a War Tent close by. Each region is separated in areas that will either be colored with respective faction's color or not having any at all. This is decided by what faction controls the current Town Hall. Click a black diamond (representing a base) on the Deployment map to teleport to that specific point of the map, the bigger the diamond the more active the zone.
Spawn & Respawn
Once you've deployed to a base, the first thing you should do is assign your spawn to that base so that you can respawn there after you die. Press E to open the Base's menu and click the house icon ![]() at the bottom to assign your spawn there.
at the bottom to assign your spawn there.
After dying, you will be able to spectate friendly soldiers near your corpse while being able to cycle through them with PgUp and PgDown.
You can click the respawn button to respawn at the base you chose. This process consumes 1 Soldier Supplies (item that looks like a shirt) in the base's stock. Once the base no longer has any Soldier Supplies you can no longer respawn there! So keep an eye on the amount your base has.
You can only assign yourself two possible spawn, a Forward Base spawn and a Home Base spawn (Town Base and Relic Base). Selecting a new spawn point will replace the old one.
Gearing up
At your base, press E to open its menu. In the center is the stockpile, click on what you need to retrieve it (takes a few seconds per item). Grab a Rifle and 2 or 3 magazines of the corresponding ammo (usually 7.62mm). Close the menu with Escape, then press Tab to open your inventory. Click on the rifle in the bottom "backpack" section to equip it and Tab again to close the inventory. Press 1 to equip your rifle and R to reload it. Aim with RMB and fire with LMB.
You can drop unwanted items in your inventory with Alt + LMB.
Also grab a bandage. if you are bleeding ![]() , equip the bandage (gets in the third slot), press
, equip the bandage (gets in the third slot), press 3 then LMB to use the bandage. It will stop the bleeding but not heal you.
You can carry downed soldier by pressing V to move them to safety or bring them to a medic. The downed soldier cannot bleed out as long as they're carried. Press Shift + V to drop them.
You know the basics to fight. Read the Combat Guide to learn more.
Open the map and find the nearest front line (where blue and green icons meet).
Driving
Resources & Crafting
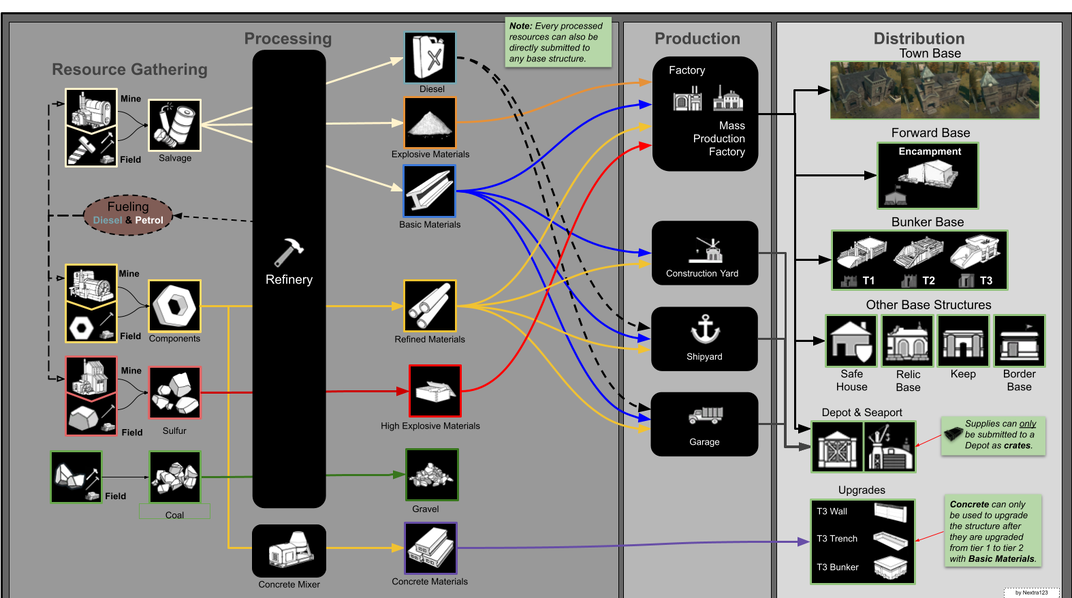
Logistics is a huge aspect of the game. Nearly every item, weapon, ammo, structures in the game is created by players.
There are several main resources you will gather during the war.
- Salvage
 : resource used for making Basic Materials
  , Diesel
  , and Explosive Materials
- Components
 : resource used for making Refined Materials
- Sulfur
 : resource used for making Heavy Explosive Materials
- Crude Oil
 : resource used for making Petrol
- Aluminum & Iron: uncommon resources that occasionally drops during mining, used to progress technological research.
- Wreckage: resource that randomly spawns and is turned into Salvage and Components
Gathering Materials
Gathering resources is a simple as equipping a Hammer or Sledge Hammer, going to a resource field, positioning yourself near a small resource pile, and clicking the pile until it is depleted. Or collected from a Resource Mine.
- Salvage is mined at the
 icon and looks like a pile of assorted metal pieces or directly picked up from a Salvage Mine
  icon.
icon. - Components are mined at the
 icon or directly picked up from a Component Mine
  icon.
icon. - Sulfur is mined at the
 icon and looks like a yellow rock or directly picked up from a Sulfur Mine
  icon.
icon. - Crude Oil is picked up at the
 icon for the Oil Well.
A successful mining strike will produce a banging sound and sparks/smoke. A message will appear on bottom left of the screen telling players that they collected +2 (resource type).
Reminder! Components and sulfur can only be gathered with sledgehammers. Hammers do not work.
Refining Materials
Once obtained Salvage, Components, Sulfur, and Crude Oil can be refined at a Refinery ![]() .
.
Salvage can be refined into either Basic Materials (Bmats), Explosive Materials (Emats) or Diesel.
Components can be refined into Refined Materials (Rmats).
Sulfur can be refined into Heavy Explosive Materials.
Crude Oil can be refined into Petrol.
Usage
These materials play a vital role to securing victory in the war. Basic Materials are used in nearly every aspect of the game: building defenses and vehicles, making weapons and tools, among other things.
Refined Materials are used to produce advanced equipment in factories and vehicles at Garage ![]() .
.
Explosive Materials are only used at the Factory ![]() to produce explosives such as Grenades or R.P.G. shells
to produce explosives such as Grenades or R.P.G. shells
Heavy Explosive Materials are used for really advanced explosives like mortar or howitzer shells and the Warhead.
Building
Building structures requires a Hammer and some material, or a Shovel, or Large Materials. Most structures require either Basic Materials.
Bunker and Trenches in their first stage just require a shovel, but when upgrading them to the next tier, you'll need Basic Materials and in higher tiers Concrete.
To build equip the hammer and press B to select the structure you want. You should now have a blue copy of the structure to move around and place. You can rotate the blue structure with the RMB + drag(right mouse button). Finalize your placement with the LMB (left mouse button).
Repairing structures always only cost you Basic Materials to repair, even if you needed another resource to build it.
Bunker Bases: For a tutorial on how to build a basic bunker base check out this video here: https://www.youtube.com/watch?v=3clsDKZOlzU&ab

